
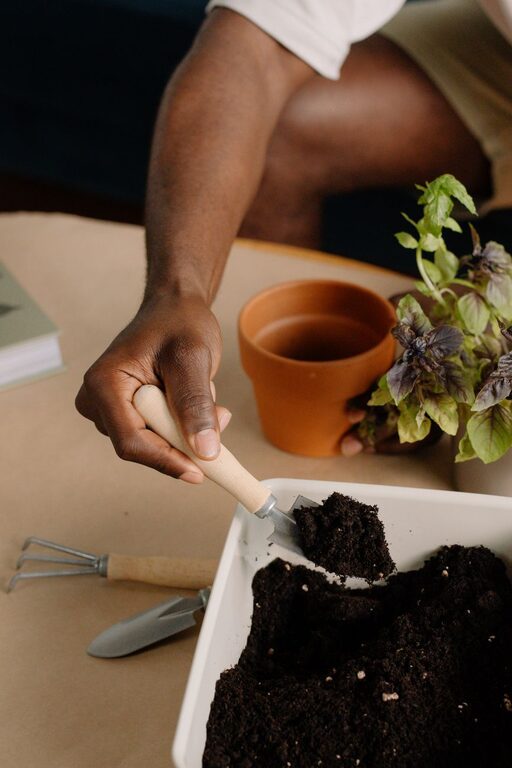
Starting a small herb garden indoors is a rewarding way to add fresh flavors to your cooking and brighten up your living space. Growing herbs inside your home is not only convenient but also beginner-friendly, even if you don’t have a green thumb. Whether you have a sunny windowsill or a small countertop, you can create a thriving indoor herb garden with just a few simple steps.
Why Grow Herbs Indoors?
Indoor herb gardens offer many benefits. You get easy access to fresh herbs like basil, parsley, and mint, which can enhance your meals. Growing herbs indoors also helps purify the air, adds a touch of greenery to your home, and can be a fun and relaxing hobby. Plus, indoor gardens are less affected by pests and weather changes, making it easier to maintain healthy plants year-round.
Choosing the Right Herbs for Indoor Growing
Not all herbs do well indoors, so it’s important to pick varieties suited to your home’s light and temperature conditions. Here are some easy herbs to start with:
– Basil: Loves sunlight and warmth.
– Parsley: Adaptable and grows well in moderate light.
– Mint: Thrives in indirect sunlight and can spread quickly.
– Chives: Easy to grow with moderate light.
– Thyme: Prefers bright light and dry soil.
– Rosemary: Needs lots of sunlight and well-draining soil.
Try starting with two or three different herbs to keep things manageable.
Supplies You’ll Need
Before planting, gather the necessary materials:
– Small pots or containers with drainage holes
– Good-quality potting mix (ideally one formulated for herbs or vegetables)
– Herb seeds or starter plants from a nursery
– A tray or saucer to catch excess water
– A sunny spot or grow light
– Watering can or spray bottle
– Labels or markers to identify each herb
Choosing containers that fit your space and style will make your indoor herb garden even more enjoyable.
Step-by-Step Guide to Starting Your Indoor Herb Garden
1. Select a Suitable Location
Most herbs need at least 6 hours of sunlight a day. A south- or west-facing window is ideal. If natural light is limited, consider using a grow light that mimics sunlight. Position your plants so they receive ample light but avoid direct harsh afternoon rays that can scorch leaves.
2. Prepare Your Containers
Ensure each pot has drainage holes to prevent waterlogging, which can cause root rot. Add a small layer of gravel or small stones at the bottom to improve drainage. Fill the pots with potting mix, leaving about an inch from the top.
3. Plant Your Herbs
If using seeds, follow the packet instructions for planting depth and spacing. Cover seeds lightly with soil and water gently. For starter plants, dig a hole in the soil the size of the root ball, place the plant in, and fill in around it with potting mix. Lightly press the soil to remove air pockets.
4. Water Properly
Herbs like moist but not soggy soil. Water when the top inch of soil feels dry. It’s better to water deeply and less often than to water lightly every day. Avoid getting water on the leaves to reduce the risk of fungal diseases.
5. Provide Adequate Light
Monitor your herbs’ health and adjust their location if needed. If leaves look leggy or pale, your plants may need more light. If they get scorched or turn brown, try moving them to a spot with less direct sun.
6. Feed Your Plants
Use a balanced liquid fertilizer every four to six weeks to support healthy growth. Dilute it to half the recommended strength to avoid overfeeding, which can damage the herbs.
7. Prune Regularly
Pinching off the tips of your herbs encourages bushier growth. Trim any flowers as they appear to keep the leaves tasting fresh. Regular harvesting also keeps plants productive.
Troubleshooting Common Issues
– Yellow leaves: Often caused by overwatering or poor drainage. Check soil moisture and pot drainage.
– Leggy growth: Too little light. Move plants closer to the light source.
– Wilting: Could be underwatering or root problems. Adjust watering and inspect roots.
– Pests: Indoor herbs can occasionally attract aphids or spider mites. Wipe leaves with a damp cloth and use natural insecticidal soap if needed.
Tips for Success
– Rotate your pots every few days to ensure even light exposure.
– Use a humidity tray or mist herbs occasionally if the air is dry.
– Repot herbs into larger containers as they grow bigger.
– Label your plants to keep track and remember their care needs.
Harvesting Your Herbs
Harvest herbs in the morning after the dew has dried for the best flavor. Cut stems just above a leaf node to encourage further growth. Use fresh herbs immediately or dry them for later use.
Conclusion
Starting a small indoor herb garden is simple and satisfying. With the right herbs, a sunny spot, and proper care, you can enjoy fresh herbs all year long. Whether for cooking or decoration, your indoor herb garden will bring a refreshing touch of nature into your home. Happy gardening!